


Hood dent removal is a DIY option for car enthusiasts, saving money and enhancing resale value. Assessing dent severity determines tools needed—heat guns for minor dents or professional frame straightening for major damage. Using tools like pneumatic dent pullers and protective gear ensures structural integrity and aesthetic appeal. This guide offers step-by-step instructions for DIY removal, with professional assistance recommended for deeper dents.
“Uncover the secrets to a flawless car exterior with our guide to DIY hood dent removal. We demystify the process, equipping you with the knowledge to tackle those unsightly dents yourself. From understanding the basics of dent removal to uncovering the top-rated tools for the job, this comprehensive article is your go-to resource. Learn a step-by-step approach that promises success and saves you time and money. Master the art of hood dent repair and restore your vehicle’s pride with confidence.”
- Understanding Hood Dent Removal Process
- Top Tools for Effective Dent Repair
- Step-by-Step Guide to Successful DIY Removal
Understanding Hood Dent Removal Process
Hood dent removal is a process that involves correcting misaligned panels on a vehicle’s hood, restoring its original shape and smooth surface. It’s a DIY-friendly task for car enthusiasts who want to save money or those looking to freshen up their ride before selling it. The first step in the process is to identify the extent of the damage and gather the necessary tools and materials. This can include specialized tools like dent pullers, pliers, hammers, and even a heat gun for more severe dents. Once prepared, the removal process begins with careful manipulation of the dented panel using the tools to pop it back into place, following the natural contour of the hood.
The method might vary slightly depending on whether you’re dealing with a minor dent or a more significant damage that requires frame straightening. For smaller dents, applying heat can help make the metal more pliable, aiding in its removal. In contrast, severe dents might necessitate a trip to a reputable car repair shop where professionals use advanced techniques and equipment for precise hood dent removal, ensuring your vehicle retains its structural integrity and aesthetic appeal. Consider the level of damage and your comfort level before attempting this task yourself or seeking professional auto repair near you.
Top Tools for Effective Dent Repair
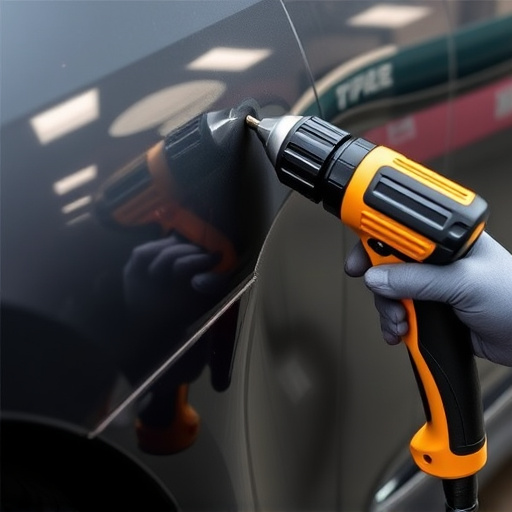
When it comes to DIY hood dent removal, having the right tools makes all the difference. The best products for this task are designed to offer precision and effectiveness in fixing those unsightly dents on your car’s hood. One of the top tools for effective dent repair is a pneumatic dent puller, which uses air pressure to gently remove dents from the car body panel. These tools are versatile and can handle various sizes and types of dents, making them a popular choice among DIY enthusiasts.
Additionally, a set of dent removal tools that include a variety of tips and attachments can be invaluable. These kits often come with pry bars, clamps, and mallets, allowing you to tackle different aspects of hood dent removal with ease. Remember, when engaging in car body repair or autobody repairs, safety is paramount. Always wear protective gear, follow instructions carefully, and ensure your workspace is well-lit and organized for the best results in your DIY endeavors.
Step-by-Step Guide to Successful DIY Removal

Removing a hood dent by yourself can seem daunting, but with the right tools and a systematic approach, it’s entirely manageable. Here’s a step-by-step guide to ensure your DIY hood dent removal project is successful. First, prepare your workspace by laying out all necessary materials, including a dent puller tool, rubber mallet, and a cloth for protection. Next, clean the dented area thoroughly to ensure better adhesion when using the tools. Once ready, insert the dent puller into the gap created by the dent, applying gentle pressure as you slowly slide it across the surface. As you reach the edges of the dent, switch to the rubber mallet to gently tap around the edges, working your way out. This process will start to pop the dent out. After carefully removing the dent, use the cloth to wipe down the area, revealing a smooth, dent-free hood.
For more complex cases or deeper dents, consider using a combination of these tools and even seeking guidance from automotive collision repair professionals. Remember, patience is key throughout the process. By following these steps, you’ll be well on your way to achieving a flawless finish for your vehicle body repair, all while saving time and money on costly vehicle repair services.
Hood dent removal can be a cost-effective and rewarding DIY project. By understanding the process, investing in the right tools, and following a structured guide, you can successfully repair dents on your vehicle’s hood. Remember that patience and precision are key to achieving professional results. With the right approach, you’ll not only save money but also gain a newfound sense of accomplishment. Happy dent removal!