


Hood dent removal involves assessing damage, heating affected areas, using specialized tools to push out dents, and potential repainting. Essential tools include screwdrivers, dent pulling tools, air compressor, body filler, primer, and paint. DIY for shallow dents with careful preparation, but severe cases require professional collision repair services.
Experience hail damage on your vehicle’s hood? Don’t panic! Hood dent removal is a feasible DIY project. This guide breaks down the entire process, from understanding the technique to gathering the right tools and materials. Learn how to effectively repair those unsightly dents, restoring your car’s sleek look. Following our step-by-step instructions, you’ll master the art of hood dent removal, saving time and money while achieving professional results.
- Understanding Hood Dent Removal Process
- Tools and Materials Required for Repairs
- Step-by-Step Guide to Effective Hood Dent Removal
Understanding Hood Dent Removal Process

Hood dent removal is a specialized process designed to restore the original shape and appearance of your car’s hood, after it has been damaged by hail or other impacts. Understanding this process is crucial for those considering DIY repairs or visiting an automotive body shop. The first step involves assessing the extent of the damage and determining if the dent can be safely removed without causing further harm to the metal. This often requires a careful examination with specialized tools.
Once ready, the hood dent removal technique typically begins with heating the impacted area, making the metal more pliable. A trained technician then uses specific tools to gently push out the dented section until it returns to its original position. The process demands precision and expertise to avoid marring or compromising the surrounding panel. After the dent is removed, the area may require additional car body restoration work, such as repainting or priming, to match the hood’s original finish and ensure a seamless appearance.
Tools and Materials Required for Repairs

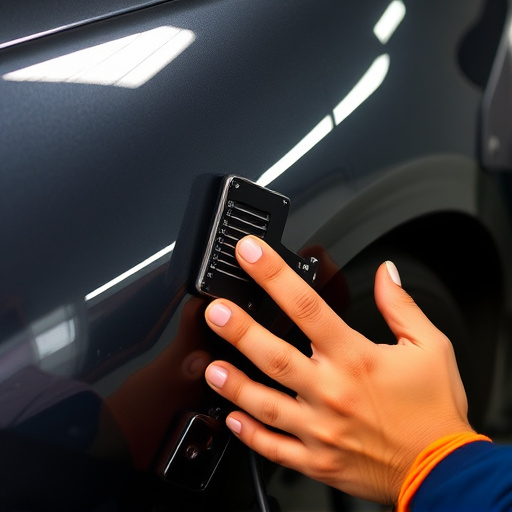
To successfully perform a hood dent removal, several tools and materials are essential. The first step in any effective hood dent removal process is to gather the right equipment. This includes a set of prying tools like flathead screwdrivers or dent pulling tools, which help leverage and pop out the dented panel. Additionally, you’ll need an air compressor for inflating a small balloon or bag, a technique often used to gently push out stubborn dents.
For effective sealing and long-lasting results, prepare a kit with body filler or putty, primer, and paint. These auto repair services essentials are crucial for repairing the damaged area seamlessly. Remember, proper preparation is key; using high-quality materials ensures your hood dent removal is both successful and durable, restoring your vehicle’s original appearance.
Step-by-Step Guide to Effective Hood Dent Removal

Hood dent removal is a process that can restore your car’s aesthetic appeal and protect its value. Before attempting any DIY methods, it’s crucial to assess the extent of the damage. If the hood dent is shallow, you might be able to fix it at home using simple tools and techniques. Here’s a step-by-step guide:
1. Preparation: Park your car under shade to prevent premature drying of any applied substances. Gather all necessary tools including a putty knife, dent remover gel or foam, sandpaper, and a clear coat if needed. Protect yourself with safety gear such as gloves and goggles.
2. Clean the Area: Thoroughly clean the hood to remove any dust, dirt, or debris that could interfere with the removal process. This ensures better adhesion for your repair materials. Once cleaned, allow it to dry completely.
3. Apply Dent Remover: Use a putty knife to apply dent remover gel or foam evenly over the dented area. Follow the product’s instructions for the best results. Allow it to set for the recommended time.
4. Remove the Dent: Carefully use the tool provided with your dent removal kit to gently press and pull on the dent, working slowly and methodically. Be patient; excessive force could worsen the damage.
5. Smoothen and Sand: Once the dent is removed, smoothen the area using fine-grit sandpaper. This will help blend it seamlessly with the rest of the hood. Make sure to remove any remaining residue from the gel or foam.
6. Paint (if necessary): If there’s a color match issue, apply a thin layer of clear coat to ensure an even finish. Allow it to dry completely before inspecting your work.
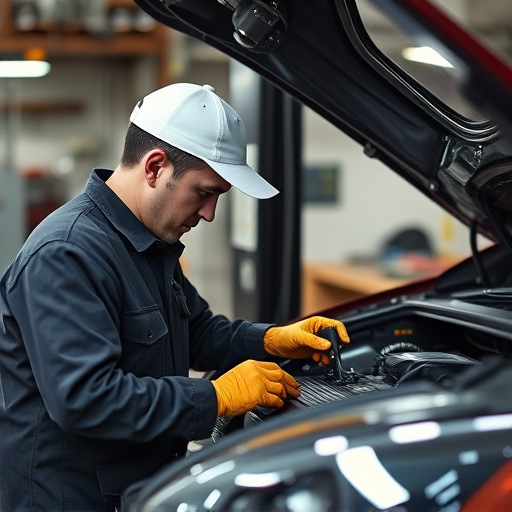
For more extensive damage or if you’re unsure about the process, consider taking your vehicle to a collision repair shop where professionals can perform automotive restoration services for a flawless finish.
In light of the above, it’s clear that effective hood dent removal is achievable with the right knowledge and tools. By understanding the process, gathering the necessary materials, and following a step-by-step guide, you can successfully address hail damage on your vehicle’s hood. Remember that proper techniques and attention to detail are key to ensuring a seamless repair, maintaining the car’s aesthetic value, and avoiding future issues. Hood dent removal is not only practical but also empowers you to take control of your vehicle’s maintenance, saving time and money in the long run.